Prepare your system
Before running Jacker stack you must acomplish some tasks to make it work.
Step 1: Create DNS Records
I reccomend you to use any subdomain for platform management purposes. This is not the domain you are serving webpages, blogs or any internet service but an access to all the applications and tools we will use to manage our docker infrastructure.
We will create two DNS records that point to our host. One of type A with our WAN_IP and a second one of type CNAME that will point all subdomains to our host.
This way we won't have to worry about adding new services to our docker stack and they will work automatically:
| Type | Name | Content |
|---|---|---|
| A | mybox.example.com | WAN_IP |
| CNAME | *.mybox.example.com | mybox.example.com |
Step 2: Configure Google OAuth2 Service
All our OAuth protected services will be hosted under our newly created DNS records, for example: https://traefik.mybox.example.com.
We will create a google project that will contain our Credentials and Web App Consent Screen and Credentials for OAuth client ID.
Step 2.1: Create Google Project
-
Navigate to the Google Cloud Devleopers Console
-
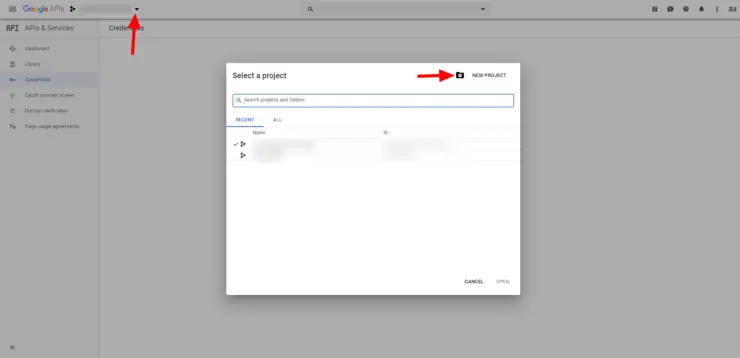
Click on Select a project
-
Click on Create a new project
- Enter a name to identify the project, suck as "Traefik Authentication"
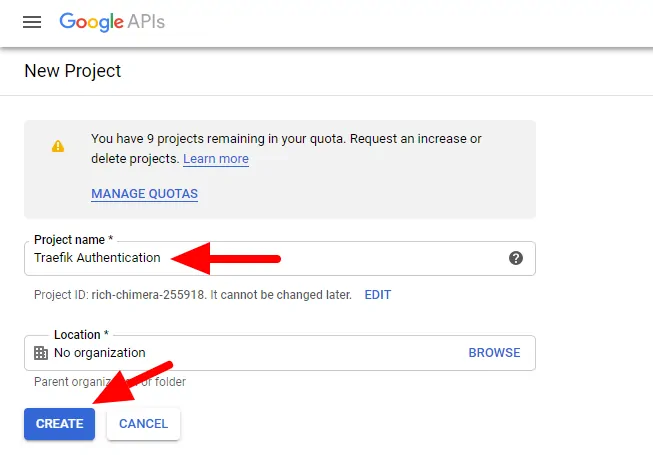
- Click Create
Step 2.2: Create Oauth Credentials
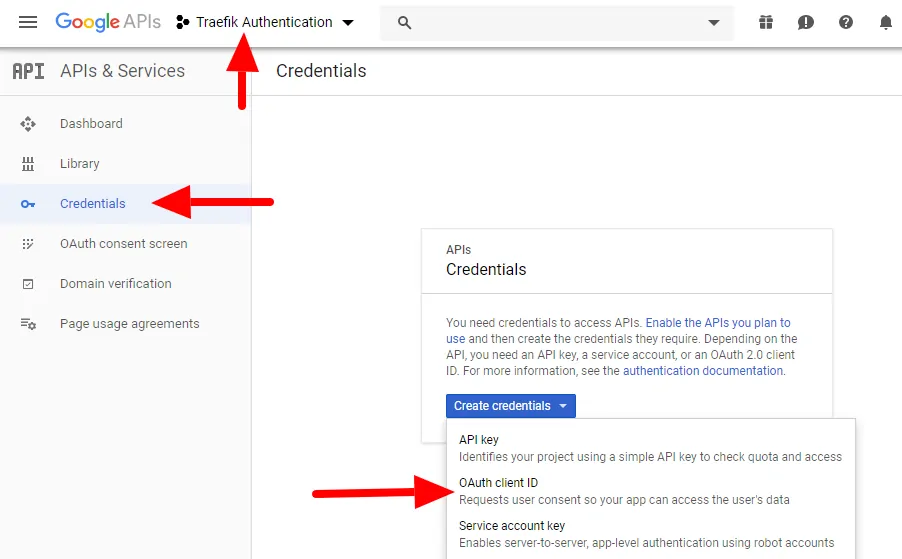
- Select our newly created project and under the Navigation menu select Credentials. Click on Create Credentials > OAuth client ID.
Step 2.3: Configure the Consent Screen

- Choose a name for your app, such ass "Traefik Auth".
- Under the Authorized domains add your FQDN of your box (ex. mybox.example.com)
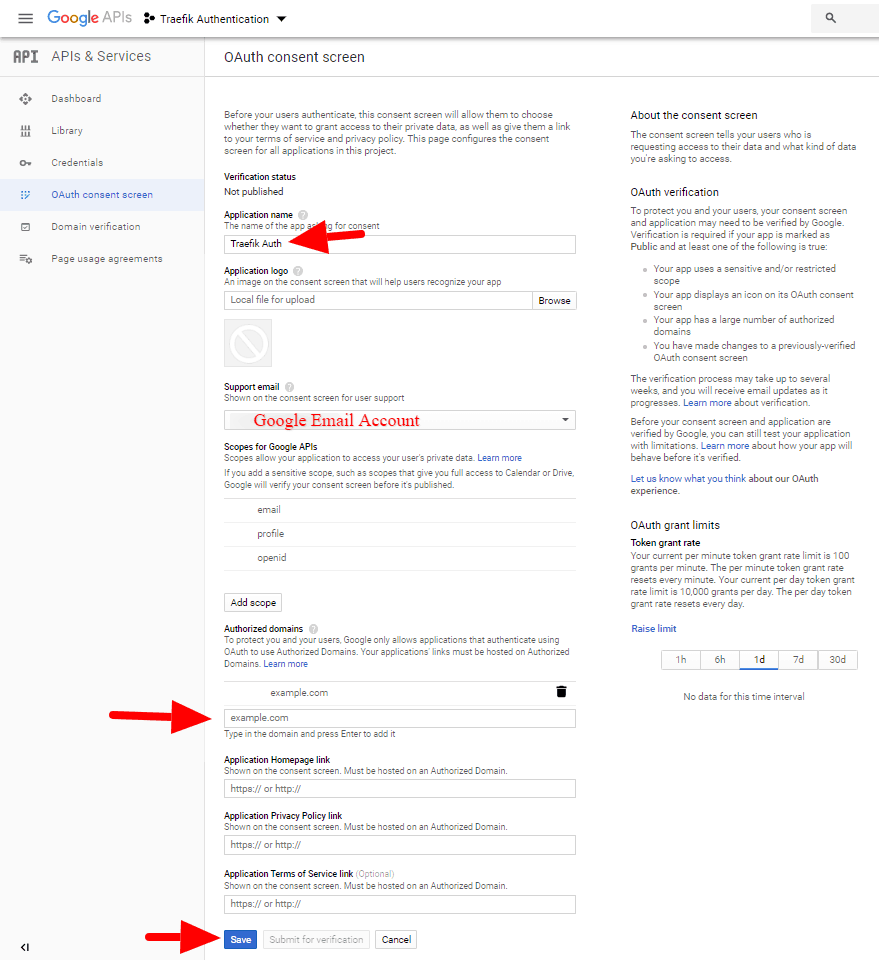
- Click Save
Step 2.4: Create the OAuth client ID
- Select Web Application type and enter a name for your web application, such as "Traefik".
- Add your Authorized redirect URI as https://oauth.mybox.example.com/_oauth.
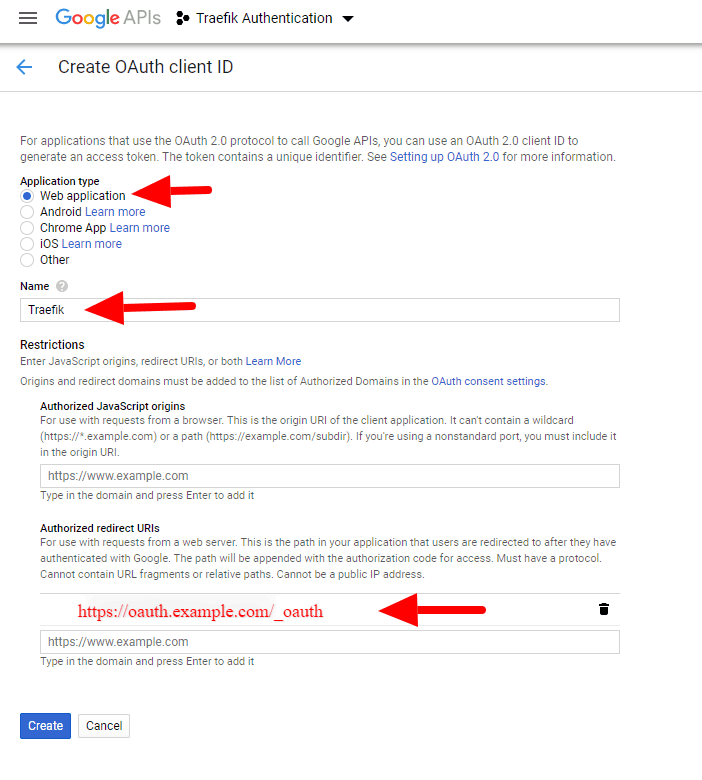
- Click Save
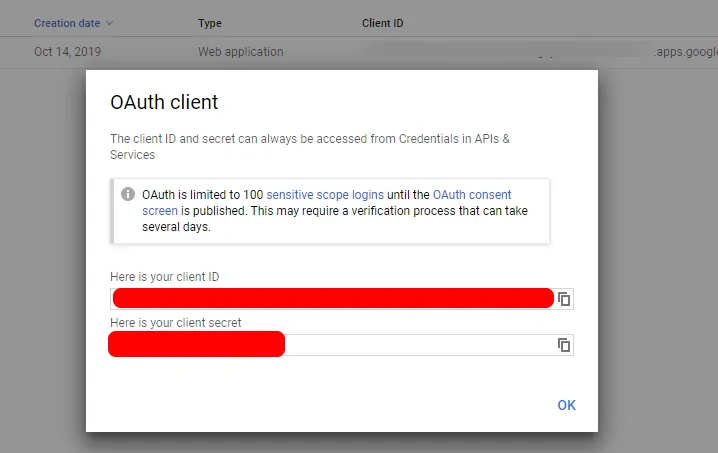
The credentials for our SSO for Traefik and Docker have been created! Copy and save the client ID and client secret
